TEPS TRIPRISM
Version: v1.6.5
Update: 05/10/2025
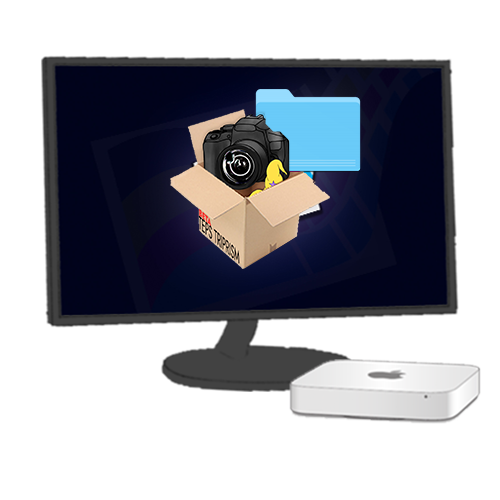
TEPS TriPrism Portrait and Event workflow software is designed for professional photographers seeking digital technology solutions to expedite the process of delivering their products and services to their customers.
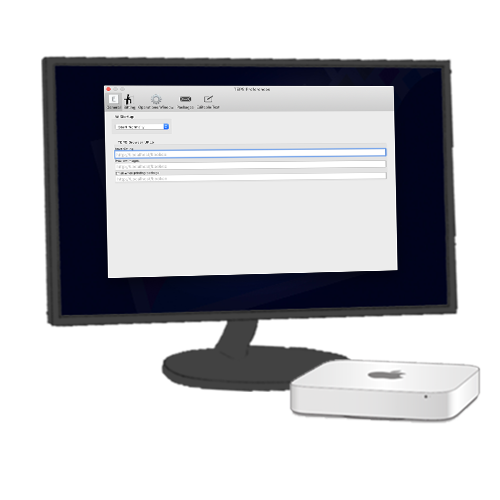
The general prefs set the overall settings for TEPS that help set the desired use and sets preferences for the overall use of TEPS.
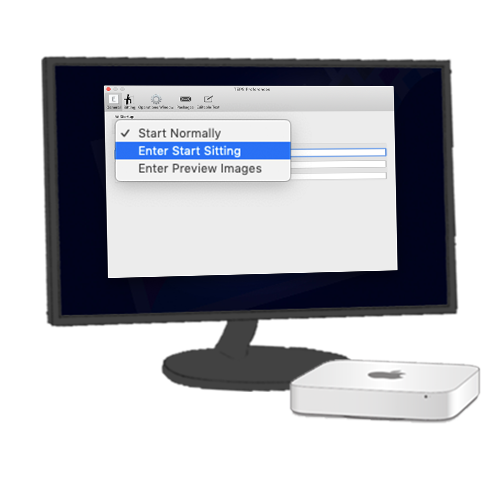
TEPS TRIPRISM offers the option on how you would like TEPS to start up.
Start Normally presents the user with the opening screen asking what they would like to do.
Enter Start Sitting automatically enters the sitting mode waiting for your photo entry method and ready to take photos.
Enter Preview Images automatically enters the preview mode where your photographer can select images to preview and print from file.
TEPS TRIPRISM offers the ability to closely integrate with Bamboo Registration. Using the TEPS Browser option allows your customers to register on a tablet device, then your photographer can pull the ID from TEPS Browser.
Start Sitting This URL is where TEPS pulls the registration ID from a URL. Often times, the URL will follow a similar pattern:
http://localhost:9090/registrationorders/photostationlist
Preview Images Once the photo has been captured, the next computer will preview the images. This can be accomplished by setting the browser URL. Often times, the URL will follow a similar pattern:
http://localhost:9090/registrationorders/poslist
Enter when printing package If your location does not participate in pre-registering using TEPS, but you still Text or email, then there is a strong likelihood you use the following URL:
http://localhost:9090/tepsregistration
! CAUTION
This feature requires the use of Bamboo. Learn more about Bamboo HERE.
If your location uses Bamboo on a separate server computer, you will replace 'localhost' with the host computers IP address OR sharing name.
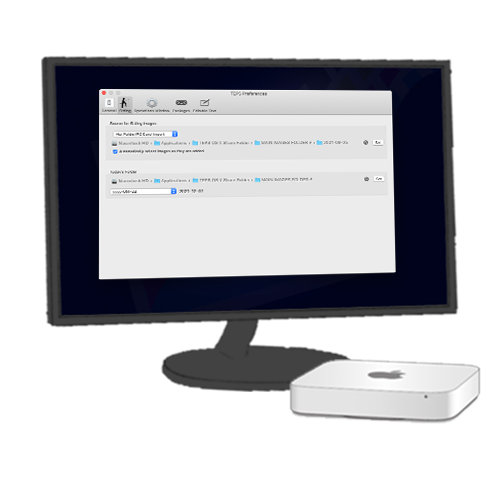
The sitting prefs set the sitting folders for the hot folder and for the main images folder for TEPS TRIPRISM. The daily sitting folder can be modified to fit various sitting name needs.
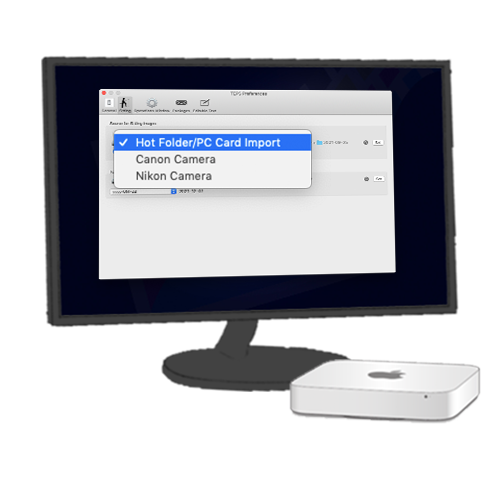
This preference sets the preference for how images are acquired. TEPS TRIPRISM supports PC Card Import, Camera Hot Folder, using TEPS CanonCapture, or using TEPS Nikon Capture.
We recommend always setting the the Hot Folder Path (if not otherwise used) to the following path:
/Users/Shared/TEPS HotFolder
If you are using third party hot folder software; you can set the hot folder to match your third party software's source image folder so the images load into TEPS.
Automatically select images as they are added If this option is selected, then each image will drop into the main preview window as it is loaded into TEPS. This is recommended to be turned OFF when loading froma camera / pc card volume.
If using "Canon Camera" or "Nikon Camera" the Automatically run camera control app preference shows. This preference will automatically open the TEPS CanonCapture / TEPS NikonCapture software when TEPS enters Start Sitting.
If using "Canon Camera" or "Nikon Camera" the Automatically RE-launch on crash/quit preference shows. This preference will automatically re-open the TEPS CanonCapture / TEPS NikonCapture software should it quit for any reason.
The Main Images folder needs to be set. This is the folder that will contain all the original images that are imported into TEPS TRIPRISM.
We recommend always setting the the Main Images folder to an easily accessible path such as:
/Applications/TEPS OS X Share Folder/Main Images
If your computer is networked (where one or more computers access the main images folder simultaneously); We recommend creating a shared folder (under the shared user account) and always setting the the Main Images folder to a folder designed to be shared such as the following:
/Users/Shared/Server Shared Folder/Main Images
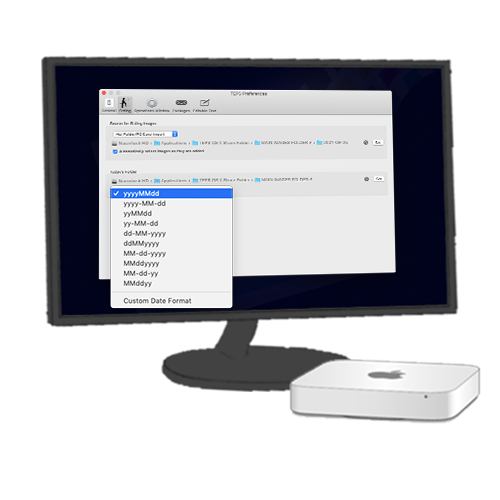
In some instances, you may wish to make the images go into a custom sitting folder names for easy organization.
The sitting folder name can be customized using multiple options. To adjust how the sitting folder names the folder that contains the images; click "Edit..." Then drag your tokens to the dark grey to adjust how sitting folder is created.
If no option is set, the images will be saved to the Main Image folder with no enclosing folder.
We recommend using a daily folder format so that images are arranged in a dated folder for event photography such as the following
"Year"-"Month"-"Day"
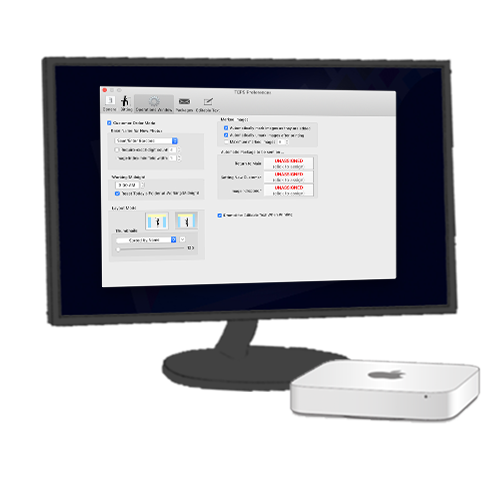
The operation window controls how images are named, how they are displayed, and other operating tasks such as automatic printing.
TEPS can be used either in Customer Order Mode or without customer order mode. The difference is whether each "Sitting" is unique to the customer or non-unique.
For instance, if a portrait photographer has many unique "groups" or "sittings" and it would be beneficial for a portrait photographer to go back and identify their "Sitting." In this instance, the photographer could opt to have "Customer Order Mode" turned on. This enables the use of BarCode / QR Code / RFID / manual entry of a customers code.
There may be other instances where photos may be captured, but naming the photos is not as important. This may be for like trade shows / open floor events where images land, but keeping track of particular clients is not important. In this instance, a photographer may opt to turn off "Customer Order Mode" and allow the images to be named a unique file format. There's also an option to regenerate the base file name for each customer so that each photo has a unique file name.
★ DID YOU KNOW?
Using TEPS Triprism, combined with PT CheckOut / PT Microsite you can create qr codes that embed urls? Use the following format when generating your QR codes for a truly unique experience!
FOR PT CHECKOUT USE:
http://ptiphotos.com/shop/ACCOUNTNAME/CODEHERE
FOR DIGITAL DOWNLOAD IMAGES USE:
http://ptiphotos.com/ACCOUNTNAME/CODEHERE
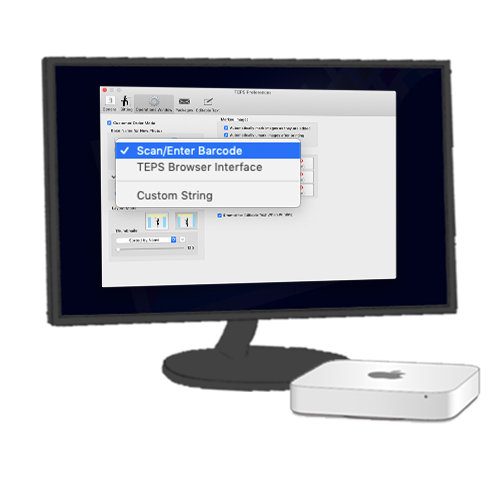
There are three unique base name options that can be used when generating new images.
Scan/Enter Barcode is primarily used when "Customer Order Mode" is enabled. With this option selected, every "sitting" has a prompt to scan or type in a barcode / qr code.
TEPS Browser Interface is used in conjunction with Bamboo registration. When customers register using Bamboo, TEPS can acces the registration information to take the photo and then can be used to recall the photo to preview and print it in a sales capacitiy.
For instance, there may be a registration station, where customers enter their name, email address, and phone number; then a photographer station where a customer has their photo captured; and then there may be preview / print stations after where a customer can have their images printed on site. In this scenario, customers register, then at the Photographer station, the photographer simply selects the customer from a list of registered individuals; and then once done, the the preview station can pull the images after they were captured - all by selecting a name on the screen, instead of using bar code / qr code.
Custom String You can use "Custom String" option to generate random code assignments for each group. Using this method, you can assign various options using drag and drop tokens like random number, year, month, day, second, milisecond, original file name, and more. These tokens can be used in combination with namually entered text or other options to generate unique file names for each image.
In addition to naming the image you can also set other variables to make sure your image naming criteria are matched.
"Require exact digit count" is an option that allows your file names to match an exact number of digits. This is beneficial in instances where you may require a set number of characters for a file name. When entering a new file name, the software will validate agains this requirement to make sure that the new photo code has this number of digits.
"Image Index min field width" is the minimum number of characters left when naming an image. Example: IMAGE_001 would have a image index min field width of "3" (note the two zeros in front of the 1. IMAGE_01 would have an image index field of "2" - essentially, it's the number of digits to count for image file name.
With Customer Order Mode turned OFF there is an option to "Regenerate basename for each image." With this option turned on; every time a new image is loaded into TEPS, the base file name is recreated. For Instance, if assign the base name to be Year + Month + Day + Minute + Second + Milisecond (YYYYMMDDMINSSmmmm) then, if you take a photo, the first YYYYMMDDMIN will match, but the SSmmmm will be different. This assures that each image has a unique file name. With the option turned off, all images would otherwise have the same file name YYYYMMDDMINSSmmmm; but they would index after _001, _002 etc.
Many events operate on a rotating / daily basis and it's adventageous that every day the sitting folder move from one operating day into the next operating day. Some examples include Santa, Easter Bunny, Haunted Houses / Events.
In some cases, these events may remain open past midnight and it may be adventageous to set the working midnight to later in the day. This means that as images are captured, they remain in the current day's "sitting" folder util the working midnight time is met.
You can turn this option on or off and set the desired 'working midnight' time from here.
We have two layout modes. The difference is whether the thumbail window runs along the entire top (the option on the left); or if it ends where the print window / tool bar starts on the right hand side (option on the right).
There is also a slider to adjust the thumbnail size. Closer to the left, smaller thumbnail image size, then closer to the right; the larger the thumbnail image size. Most operations opt to size the thumbnail around size 200.
There is also a slider to adjust the thumbnail size. Closer to the left, smaller thumbnail image size, then closer to the right; the larger the thumbnail image size. Most operations opt to size the thumbnail around size 200.
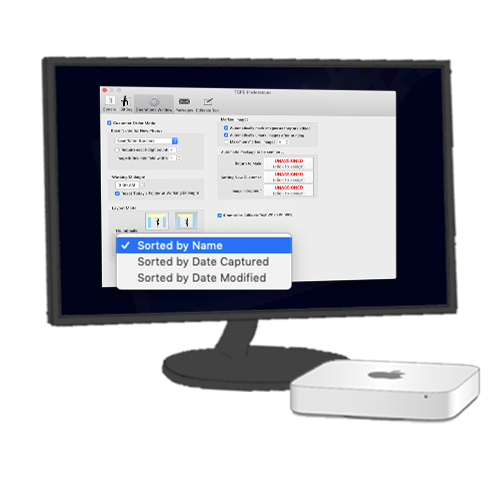
There may be a variety of reasons why you want images to sort differently when entering the thumbail window in TEPS. Currently, there are three supported modes:
Sorted by Name images are sorted alphabethically by name.
Sorted by Date Captured images are sorted chronologically based on the date/time the image was captured / imported into TEPS. (We recommend most operations use this method).
Sorted by Date Modified images are sorted chronologically based on the last date/time the images were modified (not recommended for most operations).
To the right of that drop down window you will see an up arrow / down arrow. The up arrow will set the sort order to ascending, where the down arrow sets the sort orderd to descending. One way searches in a forward pattern, and flipping the the arrow switches the defualt search order.
"Show Navigation Buttons" was a feature introduced in version 1.3.7 that allows you to have a jump to beginning, end, page right, or page left. Also included is a "jump to" section, and an add images from folder option.
Introduced in version 1.3.7 there is an option to restrict the type of images you see in the Thumbnail window.
"All Image Types" will show all images regardless of if they can be printed or not.
"All Image Types Except RAW" will show all images types unless they are RAW images.
"Only JPEG" Images will only display JPEG images that can be printed by TEPS.
This section describes actions as far as how images should be checked (marked) as they enter the TEPS application
"Automatically mark images as they are added" places a check mark next to images as they are added to the thumbnail window.
"Automatically unmark images after printing" removes the check mark next to images after they are printed with either a canvas or package print.
"Maximum marked images" Allows you to place a limit on the maximum number of images that can be selected at any given time. This option can be used to restrict / control the maximum number of images that can be selected for digital download packages, print packages, or other packages where you may want to limit the total quantity being sent at any given time.
TEPS TRIPRISM can be configured to print specific packages during certain prompts or triggers.
Return To Main This trigger would occur any time the red "X" is pressed in the upper, left-hand corner of TEPS.
Setting New Customer occurs when "Comand + 1" is pressed, or a new barcode / qr code is scanned and a new 'setting' has started.
Image Dropped happens when an image is dropped from the thumbnail window into the preview/operation window.
Packages are selected by clicking on the button, then double clicking on your desired pre-built package. See "Packages" section for information on creating packages.
TEPS TRIPRISM can detect when a second monitor is plugged in and display images only on the external monitor.
External display receives live updates When enabled, what ever you have in your preview / operation window is reflected outward to the customer window.
External display hides when inactive Removes the preview when not actively previewing outward to customers.
ℹ INFO
Using two monitors allows your operator to look at one screen and your customer to view a different screen. One of the positives is that the customer only sees what you want them to see, not all your tools.
When printing a preview template that contains editable text; you will be prompted to enter the editable text in the package window (Useful for things like Christmas Cards).

The Packages window is used to set up printing options with TEPS. The main use is to create output canvases are used to create packages that can later be used to set your package buttons.
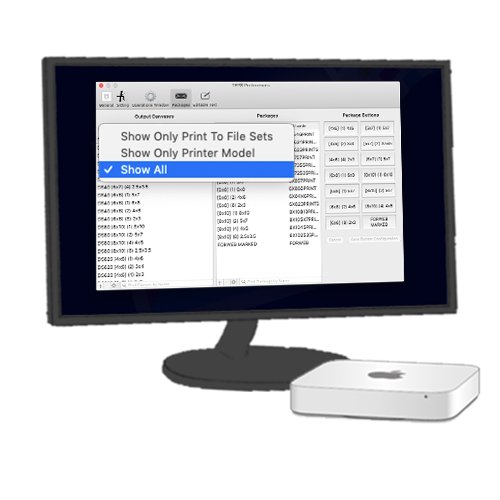
An output canvas is a template that has been assigned properties to be used when being use to save to file or print to a printer. Output canvases can be used to create packages. There are two main types of Output Canvases:
"Print To File Sets" are canvases that save the image to file or a path (like digital download images). If you select "Show Only Print To File Sets" you can see a new drop down menu that allows you to filter which path the images are saving to so you can only see those specific canvases.
"Printer Model" are canvases that are designed to print a printer. If you select "Show Only Printer Model" you can see a new drop down menu that allows you to filter which printer the canvases are linked to so you can only see those specific canvases.
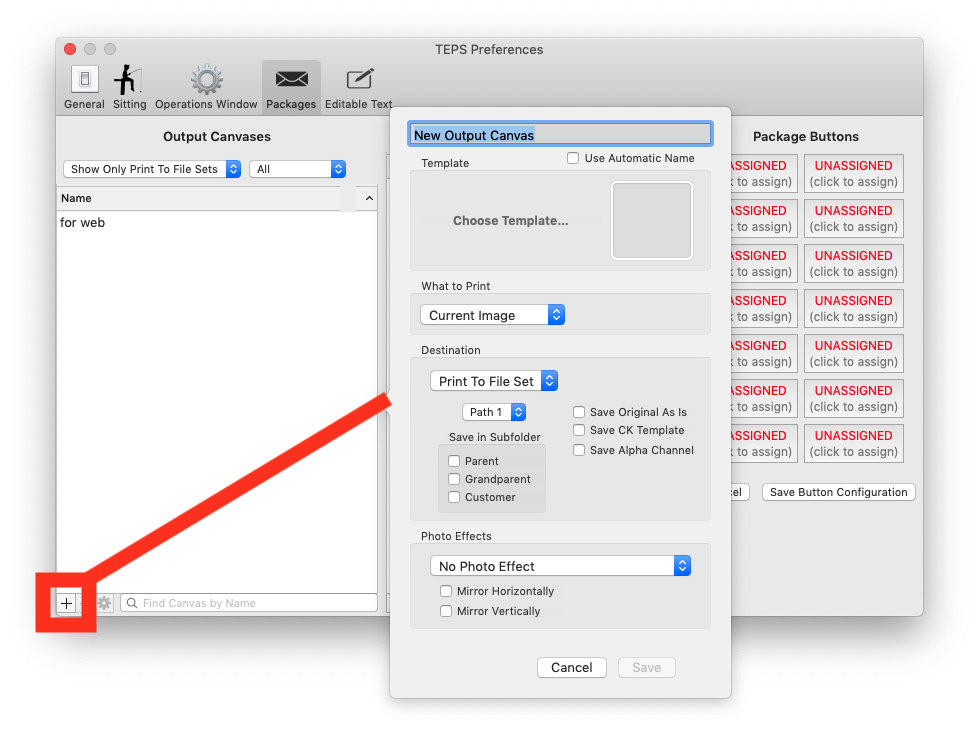
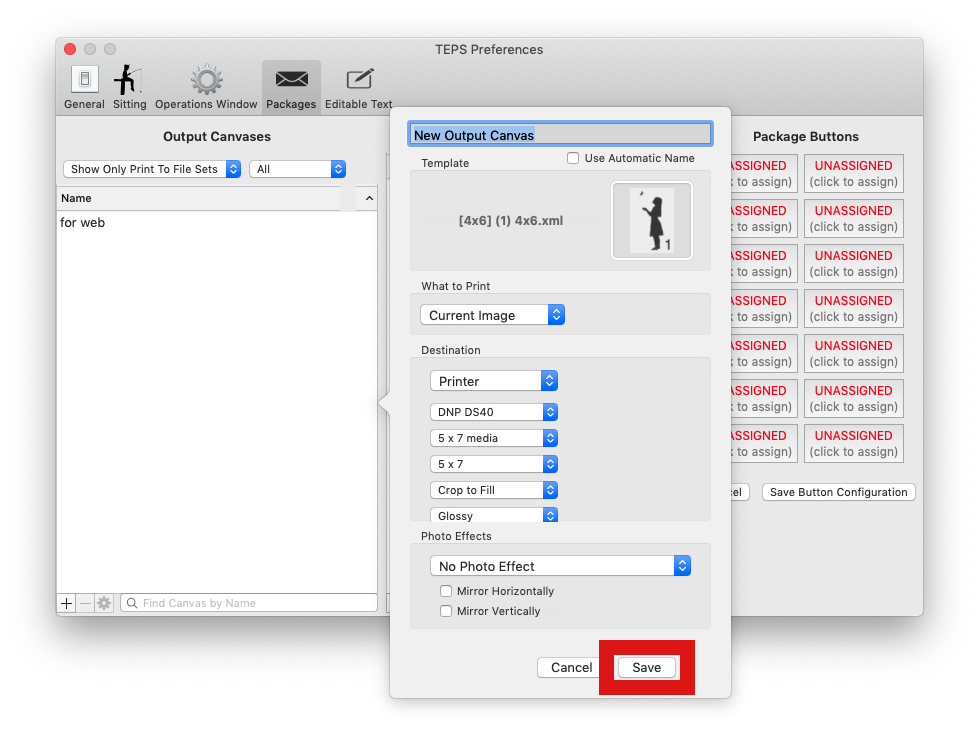
To create a new output canvas, select the "+" symbol in the lower left-hand corner. A new dialogue window will open with canvas setup options.
• CREATING NEW PRINT TO FILE
• CREATING NEW PRINT (DNP)
• CREATING NEW PRINT (OTHER PRINTERS)
Assign the new canvas a unique name or check the box for "Use Automatic Name." Using an automatic name is a system generated name designed to help symbolize possible options of your canvas.
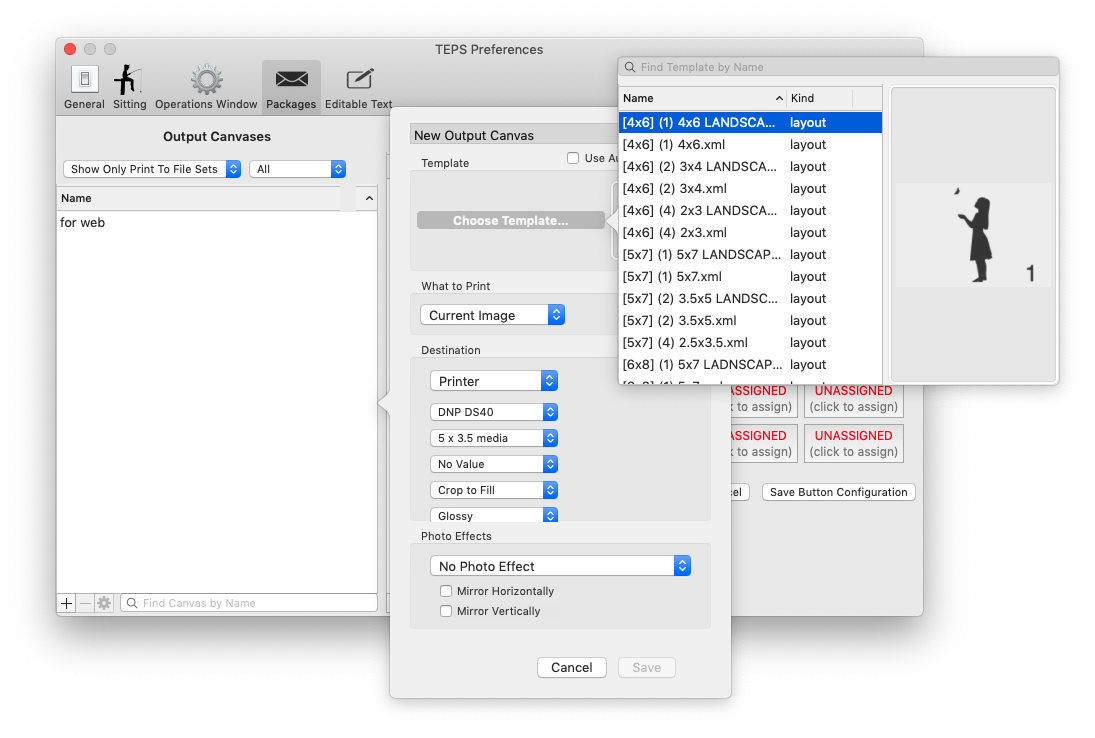
Press the dark grey words "Choose Template..." You will see a new window pop up with a list of your available "Print Templates" (See Templates for more information). Double click on your desired print template to select it.
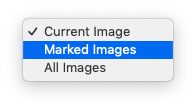
There are three options you can choose from:
"Current Image" whatever is in the preview / operation window will be printered
"Marked Images" all images marked with a check box will be printed
"All Images" all images will print
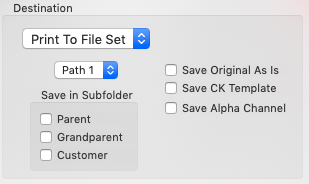
The destination for "Print To File Set" is "Print To File Set"
You can set up to eight different file Paths each path can be set separately in the TEPs Processor (see TEPS Processor for more information). Important note, is that your Path here needs to match your desired processor path.
⚠ IMPORTANT
You will need to set your path destination in the TEPS Processor. You can assign up to 8 paths, but each path will need to be set in the TEPS Processor.
Sometimes when saving images, you may need to save images in subfolders. "Parent" is the enclosing folder of your image. "Customer" is the client name. "Grandparent" is the enclosing folder 2 above where your image is located.
CUSTOMER FOLDER: /ABCD1234/ABCD1234_001.jpg
PARENT FOLDER: /PARENT/ABCD1234/ABCD1234_001.jpg
GRANDPARENT FOLDER: /GRANDPARENT/PARENT/ABCD1234/ABCD1234_001.jpg
Save Original As Is When this option is applied the original, unedited image is the image that is used to print to file
Save CK Template saves the selected image with any color adustments and how the image is composed in in the Preview Template window
Save Alpha Channel is used when working with Green Screen images. With Save Alpha Channel turned on, the image is saved as a transparent .png
ℹ INFO
If saving with "Alpha Channel" is enabled, your corresponding "Path" in the TEPS Processor should save the image as a .PNG file.
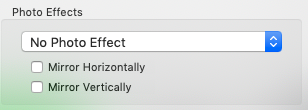
You can select desired photo effects such as the finish color. "Mirror Horizontally" flips the photo on the horizontal (X) axis. "Mirror Veritcally" flips the photo top dows (Y) axis.
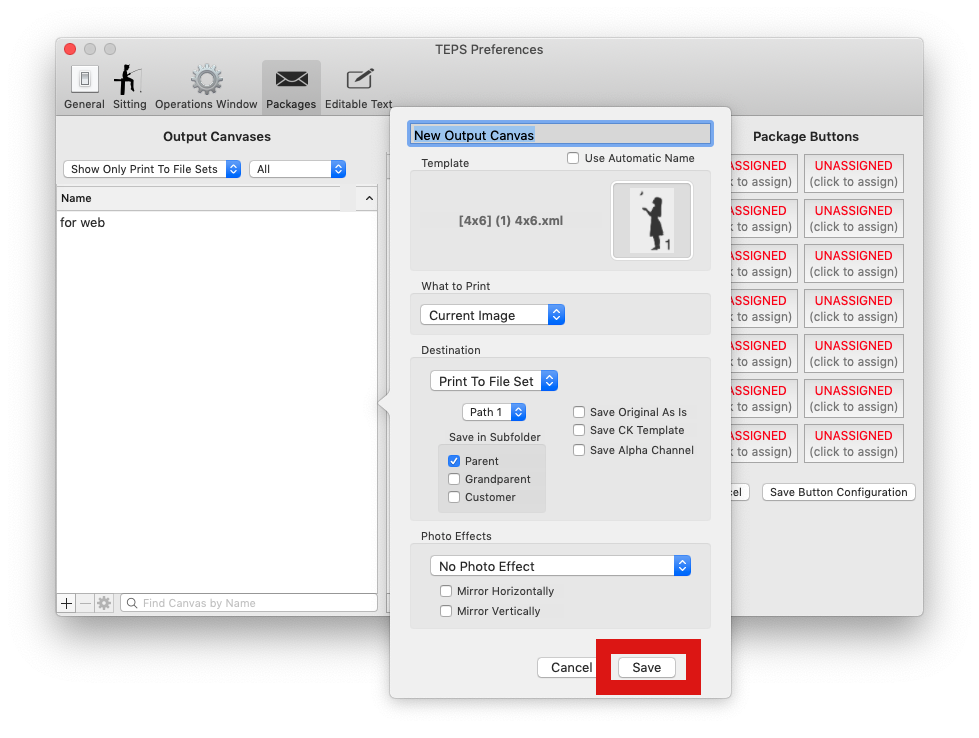
You can now click "Save" to save this canvas.
Assign the new canvas a unique name or check the box for "Use Automatic Name." Using an automatic name is a system generated name designed to help symbolize possible options of your canvas.
Press the dark grey words "Choose Template..." You will see a new window pop up with a list of your available "Print Templates" (See Templates for more information). Double click on your desired print template to select it.
There are three options you can choose from:
"Current Image" whatever is in the preview / operation window will be printered
"Marked Images" all images marked with a check box will be printed
"All Images" all images will print
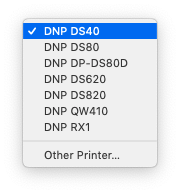
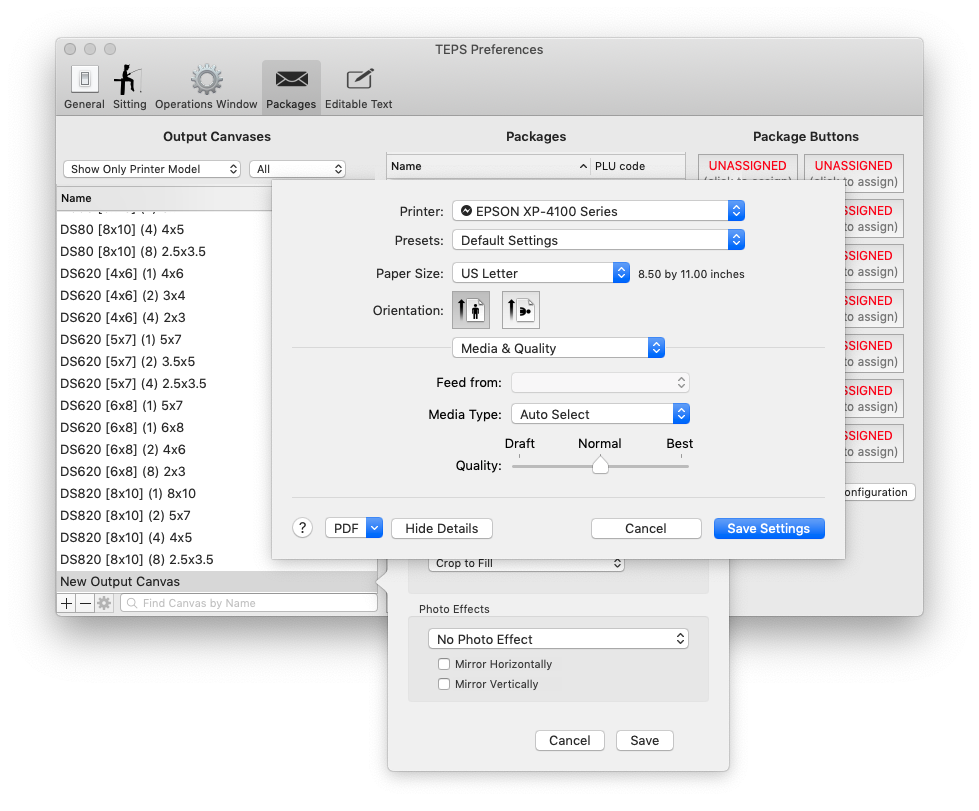
Select your DNP Printer from the dropdown list
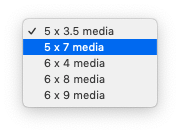
Select your media size from the drop down list
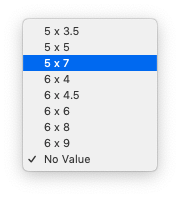
Select the size the printer should cut your media. (NOT YET IMPLEMENTED v1.3.7)

You can choose between "Crop To Fill" where the image will cut out extra or "Resize to Fit" may result in white space
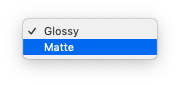
You can choose supported media finishes for your printer.
You can select desired photo effects such as the finish color. "Mirror Horizontally" flips the photo on the horizontal (X) axis. "Mirror Veritcally" flips the photo top dows (Y) axis.
You can now click "Save" to save this canvas.
Install your third party print drint driver and install your printer.
Then, assign the new canvas a unique name or check the box for "Use Automatic Name." Using an automatic name is a system generated name designed to help symbolize possible options of your canvas.
Press the dark grey words "Choose Template..." You will see a new window pop up with a list of your available "Print Templates" (See Templates for more information). Double click on your desired print template to select it.
Under Printer, then select "Other Printer.
The built-in Apple CUPS dialogue window. Select all your necessary options and settings for your printer.
You'll need to repeat this for each size and template going to the printer.
You can select desired photo effects such as the finish color. "Mirror Horizontally" flips the photo on the horizontal (X) axis. "Mirror Veritcally" flips the photo top dows (Y) axis.
You can now click "Save" to save this canvas.
Once you have created your desired output canvases, it's now time to use those canvases to create 'packages.' A package consists of one or more output canvas. Packages are used for automatic printing, or to be used when pringing with TEPS. To get started press the "+" symbol on the package side.
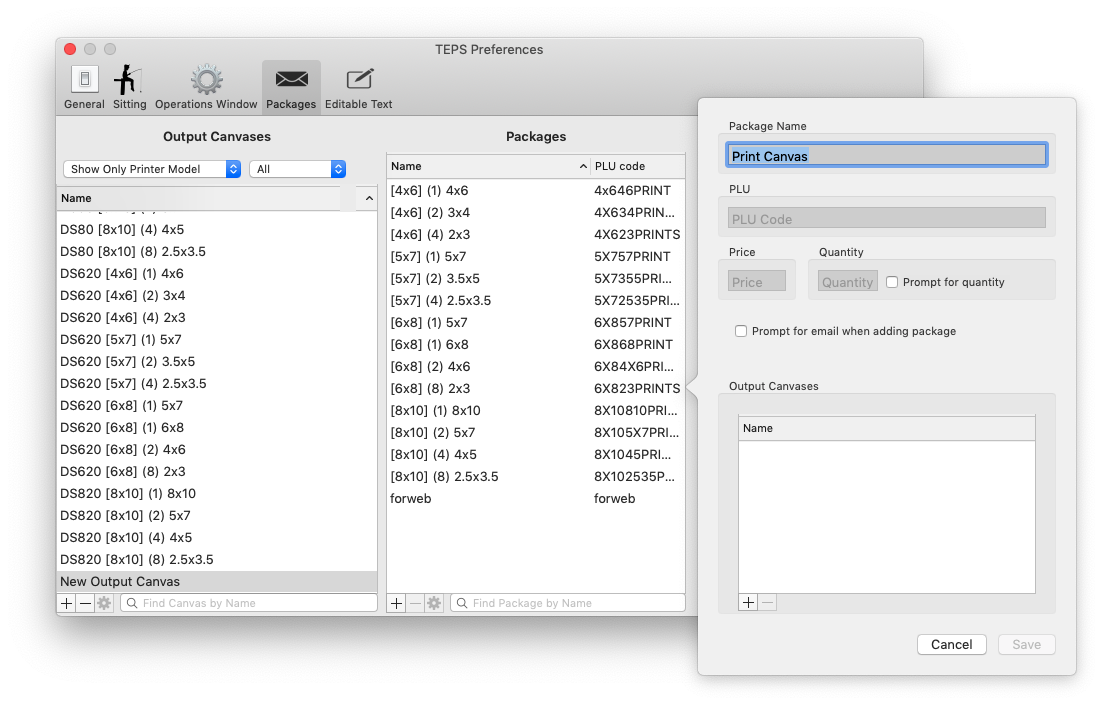
Package Name Begin by assigning your package a unique name that you (or your operators) will use when printing.
PLU All packages must be assigned a PLU code. The PLU Code should contain only letters and numbers, no spaces, or special characters
Price You can assign an optional price field.
Quantity The default quantity when left empty is 1
Prompt for Quantity When checked, once the button is pressed when operating TEPS, the operator will receive a prompt for print quantity of that item.
Prompt for Email When checked, you will receive a TEPS Browser notification to enter a customer email.
! CAUTION
The Prompt of Email feature requires Bamboo and TEPS Browser to be installed on your computer. Want to learn more about Bamboo? LEARN MORE
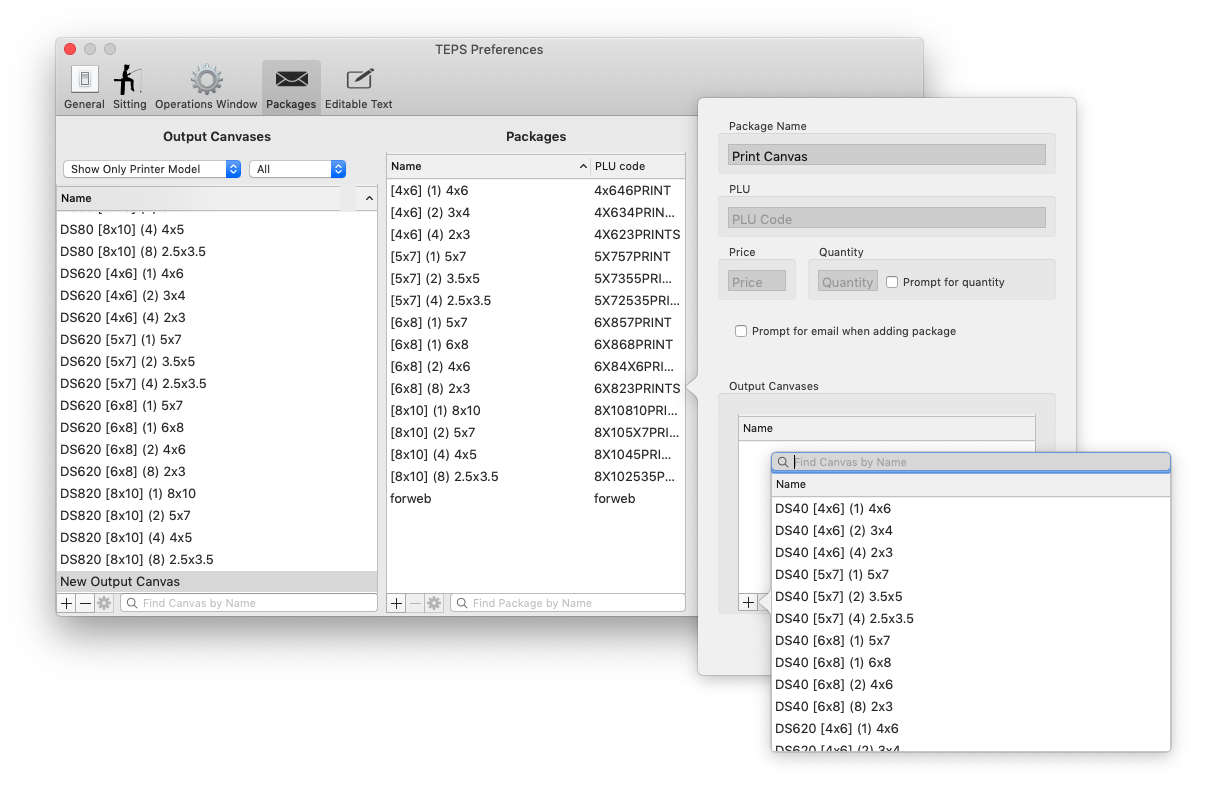
To add a canvas press the "+" and then once you locate your print canvas double click on the canvas. If you want to add additional canvases, continue to press the "+" and select your print template for each item.
Should you make a mistake or wish to remove a canvas, highlight the canvas and then press the "-" symbol.
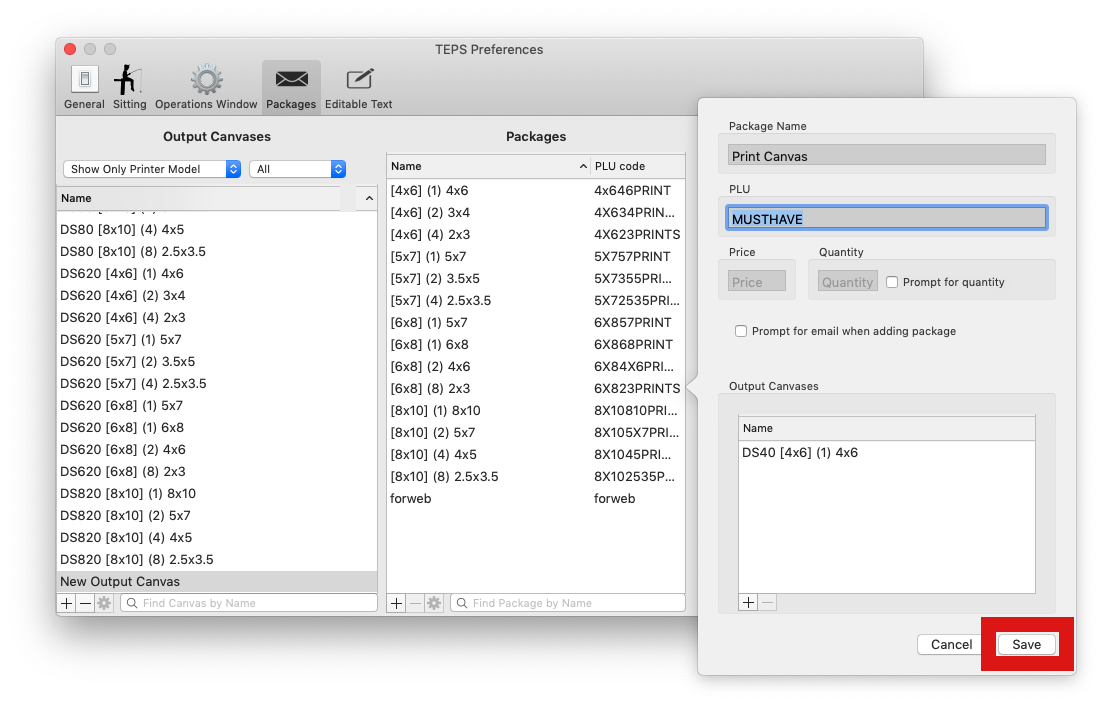
Once you are satisfied that the package contains everything you wish to print, press the "Save" button.
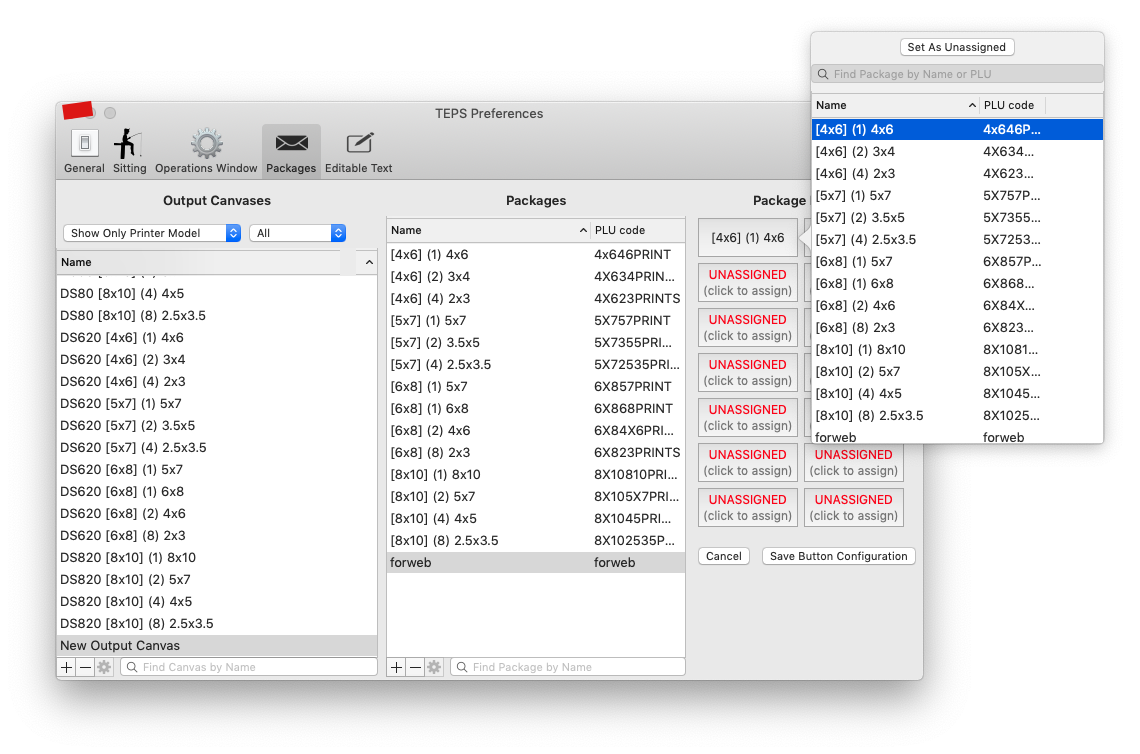
Now that the packages have been created, you can assign them to package buttons for ease of use. Simply click on an "Unassigned" button, then double click on your package to assign it.
Once you have assigned all your desired package buttons click "Save Button Configuration"
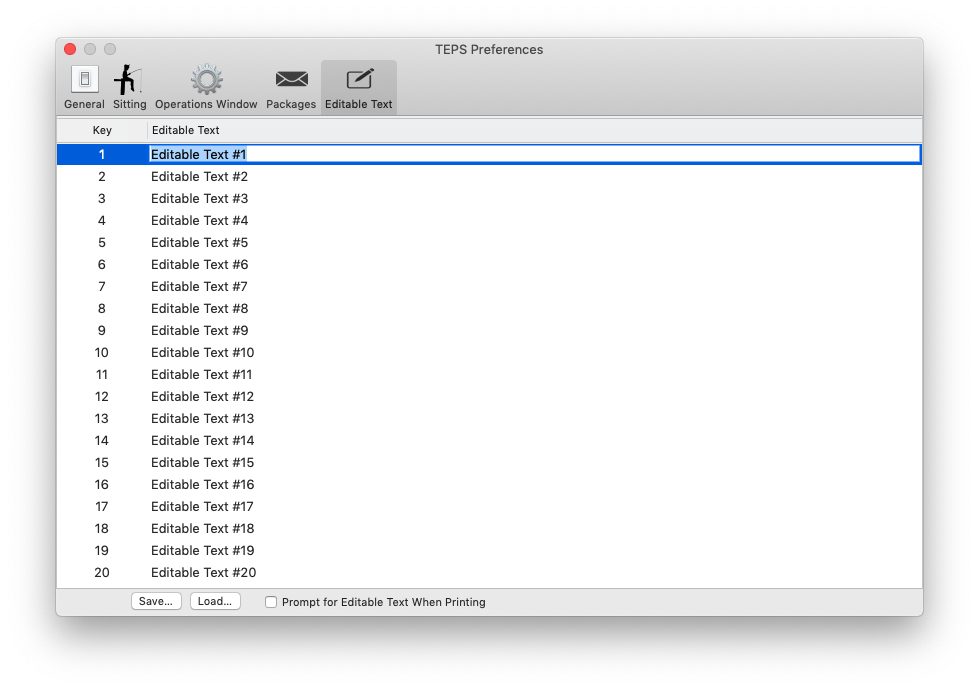
Editable text fields are fields that are designed to be easily editable and can be changed either in settings, or on prompt when printing the package.
To set an editable text field, double click the field and type in your desired text.
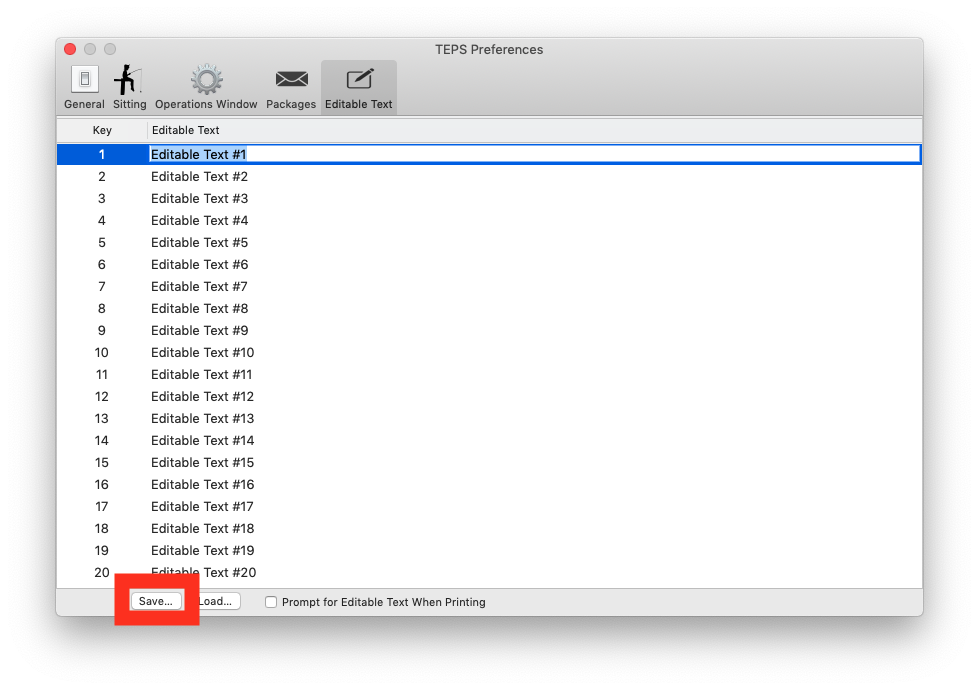
Once you have completed your editable text, press "Save"